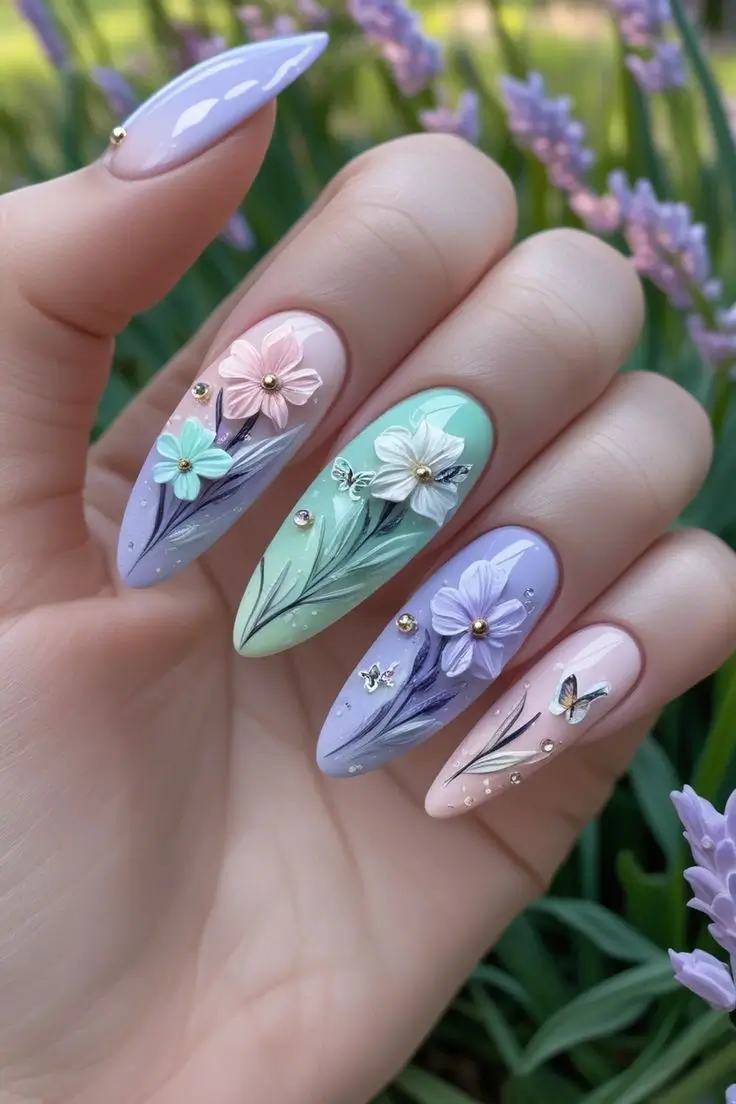
Step into a dream with “Enchanted Garden Bloom Nail Art!” This whimsical design features long, pastel-hued nails adorned with delicate 3D flowers, tiny butterflies, and sparkling rhinestone accents, evoking a magical garden scene.
Nail Art Design
💅 Materials Used
To create this intricate and charming look, you’ll generally need:
- Nail Prep: File, buffer, cleanser.
- Base & Top Coats: Essential for protection and high shine.
- Gel Polishes/Nail Polishes: – Amazon
- Soft pastel gel polishes (e.g., lavender, mint green, blush pink, pale yellow).
- 3D nail art gel or acrylic powder for sculpting flowers.
- Various pastel colored gel paints for flower details.
- Tools & Embellishments:
- Fine detail nail art brushes (for painting petals and leaves).
- Dotting tool.
- Small silicone tool or acrylic brush (for 3D sculpting).
- Tiny butterfly decals or charms.
- Small rhinestones or gold micro-beads.
- Nail art adhesive gel or resin.
- UV/LED lamp (essential if using gel products).
- Lint-free wipes & gel cleanser.
📝 Instructions: Cultivating Your Garden Nails
Achieving this detailed 3D design requires patience and precision.
- Prep Nails: Clean, file, apply base coat. Cure if using gel.
- Apply Pastel Base: Apply 2 thin coats of desired pastel polish/gel to each nail (can be solid or a subtle gradient). Cure each coat if gel.
- Sculpt 3D Flowers:
- Using 3D nail art gel/acrylic, sculpt small, delicate flowers directly onto the cured base. Build up petals for dimension.
- Cure thoroughly after each flower is sculpted (if using gel).
- Detail Flowers & Leaves: Using a fine brush and pastel gel paints, add subtle color variations and details to the flowers, and paint slender green leaves around them. Cure.
- Add Embellishments: Apply butterfly decals/charms and tiny rhinestones/gold studs using a small amount of nail art adhesive gel. Cure to secure.
- Seal: Apply a glossy top coat, carefully avoiding the raised 3D elements if you want to maintain their texture. Ensure full coverage on the rest of the nail. Cure thoroughly.
- Finish: Clean up any sticky residue. Apply cuticle oil.
Disclaimer: These steps are a suggested guide and may not be exact. Provided for reference only.
🎉 Best For Which Occasion/Event?
This whimsical and romantic design is perfect for:
- Spring & Summer Seasons: Complements the vibrant growth.
- Weddings & Bridal Showers: Adds a touch of delicate charm.
- Garden Parties & Picnics: Blends seamlessly with nature’s beauty.
- Birthdays & Celebrations: Offers a festive and unique look.
- Everyday Elegance: For those who love intricate and pretty details.
💁♀️ Suited to Which Age Group?
The “Enchanted Garden Bloom” design has a universally charming and feminine appeal:
- All Ages: Ideal for anyone who appreciates delicate, artistic, and whimsical nail art.
👗 Look Best With Which Outfit and Color Contrast?
This soft and elegant design pairs beautifully with light, airy, and feminine aesthetics:
- Complementary Outfits:
- Pastels & Neutrals: Blushes, lavenders, mints, creams, whites.
- Floral Prints: Enhances the garden theme.
- Flowy Dresses & Skirts: Especially in chiffons, laces, or light cottons.
- Romantic & Feminine Attire: Complements graceful styles.
- Bridal or Special Occasion Wear: Adds a unique, refined touch.
- Ideal Color Contrasts:
- White & Cream: Provides a soft, clean backdrop for the pastels.
- Light Metallics (Gold, Rose Gold): For subtle jewelry or accessory accents.
- Avoid: Very dark, harsh, or clashing colors that would detract from the design’s delicate charm.
Let your fingertips blossom with Enchanted Garden Bloom Nail Art!