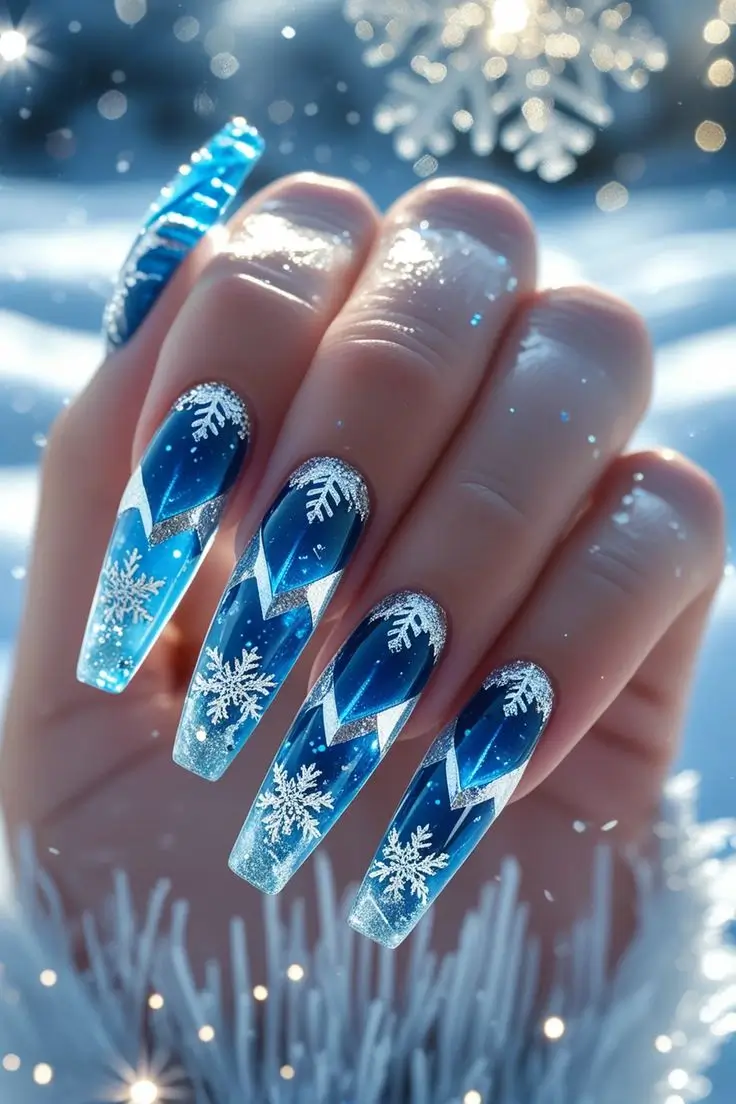
Experience winter magic with “Frozen Diamond Cut Nail Design!” These long, icy blue nails feature a glossy glass finish with striking 3D geometric embossing, silver glitter, and delicate snowflake accents.
Nail Art Design
💅 Materials Used
To create this intricate and glamorous look, you’ll generally need:
- Nail Prep: File, buffer, cleanser.
- Base & Top Coats: Essential for protection and high shine.
- Gel Polishes/Products: – Amazon
- Icy blue translucent or jelly gel polish.
- Clear building gel or 3D sculpting gel (for embossed patterns).
- Silver glitter gel polish or fine loose silver glitter.
- Tools & Embellishments:
- Fine detail nail art brush (for geometric lines).
- Dotting tool (optional, for glitter placement).
- Small snowflake decals, stickers, or stamping plates.
- UV/LED lamp (essential for curing gel products).
- Lint-free wipes & gel cleanser.
📝 Instructions: Crafting Your Icy Diamond Nails
Achieving this detailed 3D design involves layering and precise application.
- Prep Nails: Clean, file, apply base coat. Cure if using gel.
- Apply Icy Blue Base: Apply 1-2 thin coats of icy blue translucent gel polish for the base color/gradient effect. Cure each coat.
- Create 3D Embossing: Using clear building gel and a fine detail brush, carefully draw precise geometric lines and shapes to create the raised “diamond cut” patterns. Cure thoroughly after creating each element or after completing a section of the design.
- Add Silver Glitter: While some areas are still tacky (or by applying a thin layer of top coat and not curing), sprinkle fine silver glitter onto the nails, focusing on specific sections or lines. Or, paint silver glitter gel polish into desired areas. Cure.
- Apply Snowflakes: Affix snowflake decals or use a stamping plate to add delicate snowflake designs.
- Seal: Apply a glossy top coat over the entire design for shine and protection. Be mindful of the 3D elements; you can coat them for full gloss or leave them with a slightly different texture by carefully coating around them. Cure thoroughly.
- Finish: Cleanse any sticky residue. Apply cuticle oil.
Disclaimer: These steps are a suggested guide and may not be exact. Provided for reference only.
🎉 Best For Which Occasion/Event?
This elegant and dazzling design is perfect for:
- Winter Season: Complements the frosty atmosphere.
- Holiday Parties: Christmas, New Year’s Eve, winter galas.
- Formal Events: Weddings, anniversaries, sophisticated gatherings.
- Fantasy or Ice-Themed Parties: Adds a touch of magical realism.
- Special Occasions: When you want to make a truly sparkling statement.
💁♀️ Suited to Which Age Group?
The “Frozen Diamond Cut Nail Design” has a sophisticated and artistic appeal:
- Young Adults & Adults: Ideal for individuals who enjoy intricate, glamorous, and high-impact nail art with a luxurious feel.
👗 Look Best With Which Outfit and Color Contrast?
This glittering and cool-toned design pairs beautifully with elegant and winter-appropriate aesthetics:
- Complementary Outfits:
- White & Silver: Creates a cohesive frosty look.
- Blues & Cool Tones: Navy, sky blue, lavender, grays.
- Formal Gowns & Cocktail Dresses: Especially in satin, silk, or velvet.
- Winter Wear: Cashmere sweaters, elegant coats.
- Shimmering or Sequin Fabrics: Enhances the sparkling effect.
- Ideal Color Contrasts:
- Black: Provides a dramatic backdrop that makes the icy blue and silver pop.
- Deep Jewel Tones (Emerald, Sapphire): For a rich and luxurious contrast.
- Avoid: Very warm tones (reds, oranges, yellows) that might clash with the cool aesthetic.
Dazzle with the brilliance of Frozen Diamond Cut Nail Design!