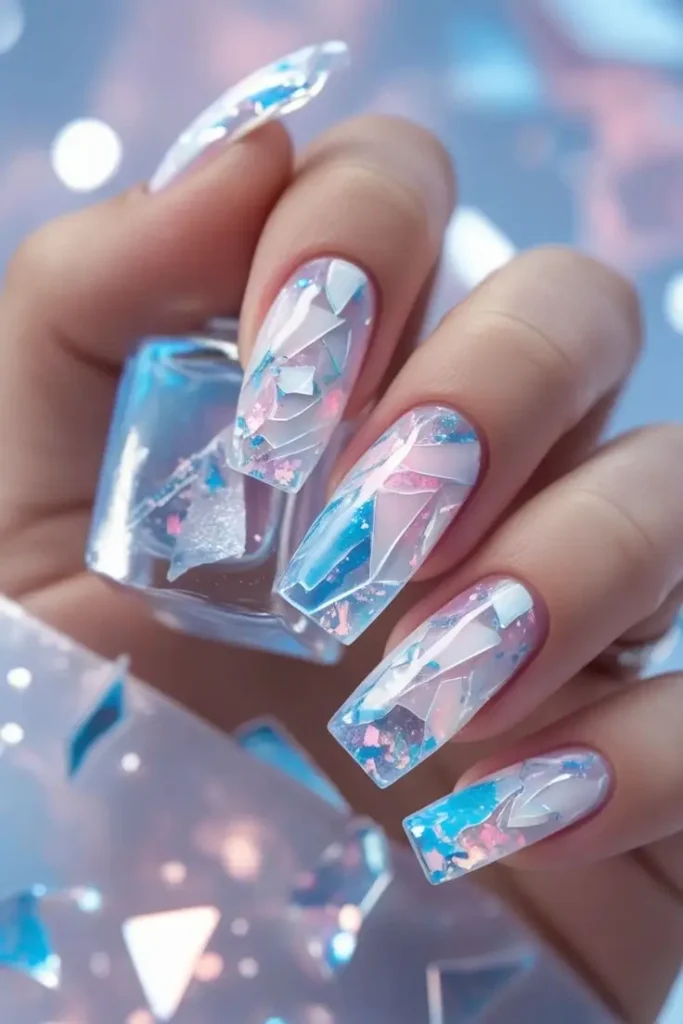
Capture winter’s magic with “Opal Ice Shard Nail Art!” This chic design features a translucent, frosted base embedded with sparkling, geometric iridescent shards and delicate glitter, creating a mesmerizing icy effect.
Nail Art Design
💅 Materials Used
To create this sparkling, frosted look, you’ll generally need:
- Nail Prep: File, buffer, cleanser.
- Base & Top Coats: Essential for protection and high shine.
- Gel Products:
- Clear builder gel or clear extension gel (for encapsulating shards). – Amazon
- Specialty Embellishments:
- Tools:
- Fine tweezers (for precise shard placement).
- UV/LED lamp (essential for gel products).
- Nail file and buffer (for shaping after encapsulation).
- Lint-free wipes & gel cleanser (for sticky layer).
📝 Instructions: Crafting Your Ice Shards
Achieving this intricate design involves careful placement and proper encapsulation of the shards.
- Prep Nails: Clean, file, apply base coat. Cure.
- Apply Base Gel & Shards: Apply a thin, even layer of clear builder gel or extension gel onto the nail. Do not cure.
- Place Shards & Glitter: Using tweezers, carefully place the pre-cut iridescent shards onto the wet gel in a random, scattered pattern. Sprinkle a small amount of fine pink and blue glitter around the shards.
- First Cure: Cure the gel with the embedded shards and glitter thoroughly under a UV/LED lamp.
- Encapsulate: Apply a second, slightly thicker layer of clear builder gel over the entire nail to fully encapsulate the shards and create a smooth surface. Cure thoroughly.
- Shape & Refine: Wipe off the sticky inhibition layer (if any). File and buff the nail smooth, paying attention to the edges and surface to ensure no sharp points.
- Seal: Apply a glossy top coat over the entire design for maximum shine and protection. Cure thoroughly.
- Finish: Clean up any edges. Apply cuticle oil.
Disclaimer: These steps are a suggested guide and may not be exact. Provided for reference only.
🎉 Best For Which Occasion/Event?
This elegant and unique design is perfect for:
- Winter Season & Holidays: Perfectly captures the icy, festive spirit.
- Formal Events & Galas: Adds a sophisticated and unique touch.
- Weddings (Winter or Themed): For a subtle, sparkling bridal look.
- Special Occasions: When you want your nails to be a statement.
- Photoshoots: The reflective quality is highly photogenic.
💁♀️ Suited to Which Age Group?
The “Opal Ice Shard” design primarily appeals to those with a sophisticated and artistic style:
- Young Adults & Adults: Ideal for individuals who appreciate intricate, luxurious, and unique nail art.
👗 Look Best With Which Outfit and Color Contrast?
This cool-toned, shimmering design pairs beautifully with elegant and winter-inspired aesthetics:
- Complementary Outfits:
- White & Silver: Enhance the frosty, ethereal quality.
- Pastels: Light blues, pinks, lavender for a harmonious look.
- Winter Fabrics: Cashmere, velvet, silk, or faux fur.
- Formal Wear: Gowns, cocktail dresses.
- Metallic Accents: Silver, platinum, or iridescent jewelry and accessories.
- Ideal Color Contrasts:
- White & Light Grey: Provide a crisp, clean backdrop.
- Deep Blues & Purples: Can create a striking yet elegant contrast.
- Avoid: Harsh primary colors, busy patterns, or overly warm tones that might clash with the cool, ethereal nature of the design.
Shine like a frozen jewel with this exquisite Opal Ice Shard Nail Art!