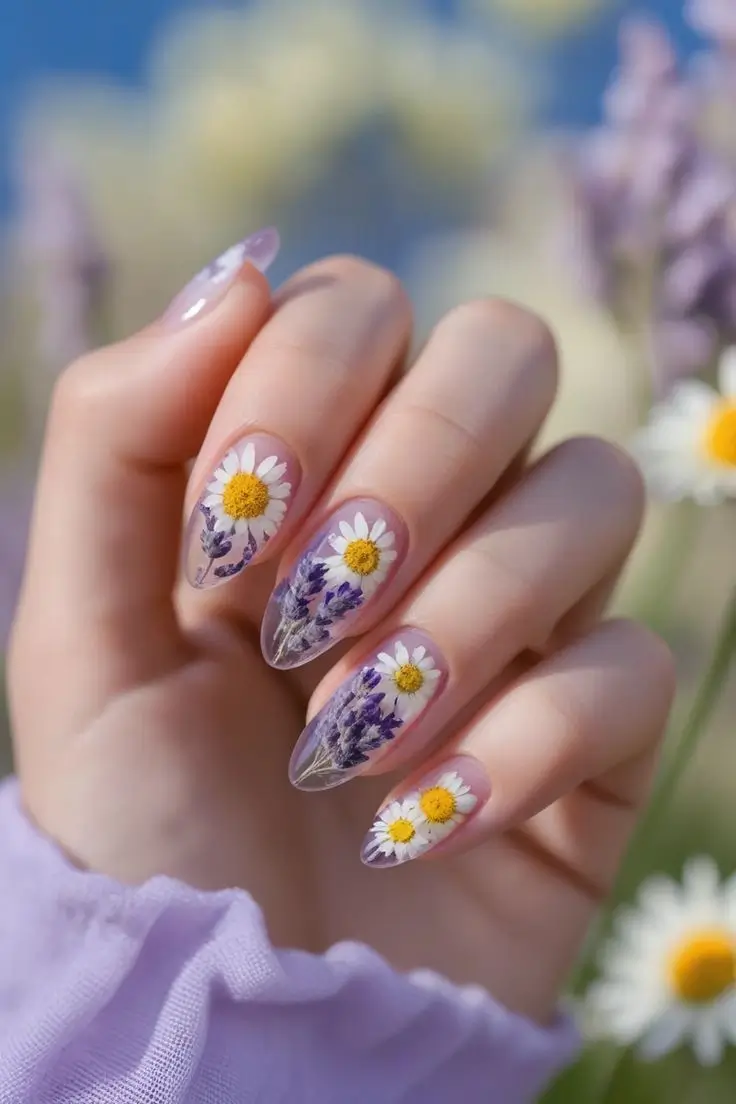
Embrace the beauty of nature with “Pressed Flower Botanical Nails!” These elegant, almond-shaped nails feature a clear or sheer base adorned with real tiny pressed flowers like daisies and lavender, creating a delicate and natural botanical art piece perfect for spring.
Nail Art Design
💅 Materials Used
To create this delicate botanical design, you’ll generally need:
- Nail Prep: File, buffer, cleanser.
- Base & Top Coats: Essential for adhesion and sealing the flowers.
- Gel Polish/Clear Builder Gel: Clear or sheer nude/pink gel polish/builder gel (easier for embedding).
- Embellishments: – Amazon
- Assorted small, real dried pressed flowers (daisies, lavender, tiny leaves).
- Tools:
- Tweezers (for precise flower placement).
- UV/LED lamp (essential if using gel products).
- Lint-free wipes & gel cleanser.
📝 Instructions: Crafting Your Botanical Nails
Using clear builder gel or a slightly thicker clear gel polish is generally the easiest way to embed real flowers for a smooth finish.
- Prep Nails: Clean, file, and apply a base coat. Cure if using gel.
- Apply Sheer Base: Apply 1-2 thin coats of clear or sheer nude/pink gel polish. Cure each coat.
- Embed Flowers:
- Apply a thin, uncured layer of clear builder gel or slightly thicker clear gel polish to one nail. Do NOT cure yet.
- Using tweezers, carefully pick up and place desired dried pressed flowers onto the wet gel, arranging them as desired. Gently press them down to adhere.
- Cure thoroughly with the flowers in place.
- Encapsulate Flowers:
- Apply another layer of clear builder gel or clear gel polish over the embedded flowers, ensuring they are fully covered and the nail surface is smooth. This encapsulates and protects them. Cure thoroughly.
- Refine Shape (Optional): If needed, gently file and buff the nail surface to ensure it’s completely smooth and even, especially around the encapsulated flowers. Cleanse dust.
- Seal: Apply a glossy top coat over the entire design for brilliant shine and protection. Cure thoroughly.
- Finish: Cleanse any sticky residue. Apply cuticle oil.
Disclaimer: These steps are a suggested guide and may not be exact. Provided for reference only.
🎉 Best For Which Occasion/Event?
This fresh and elegant design is perfect for:
- Spring & Summer Seasons: Embraces the blooming nature.
- Daytime Events: Brunch, garden parties, outdoor gatherings.
- Weddings & Bridal Showers: Adds a delicate, romantic touch.
- Casual Chic Wear: Elevates everyday looks with natural beauty.
- For Nature Lovers: Ideal for those who appreciate botanical elements.
💁♀️ Suited to Which Age Group?
The “Pressed Flower Botanical Nails” design has a universally appealing and graceful charm:
- Teens, Young Adults & Adults: Ideal for individuals who enjoy natural, elegant, and subtly artistic nail art.
👗 Look Best With Which Outfit and Color Contrast?
This soft and organic design pairs beautifully with light, natural, and airy aesthetics:
- Complementary Outfits:
- Pastel Colors: Soft pinks, lavenders, mint greens, sky blues, and creams.
- White & Neutrals: Allow the flowers to stand out.
- Flowy Fabrics: Linen, cotton, chiffon, and lace.
- Bohemian or Romantic Styles: Dresses, skirts, floral prints (subtle).
- Natural Materials: Straw hats, wicker bags.
- Ideal Color Contrasts:
- Light & Sheer: To maintain the delicate, natural aesthetic.
- Soft Earth Tones: Can complement the botanical theme.
- Avoid: Very dark, harsh colors or overly busy, geometric patterns that would clash with the organic feel.
Let your nails blossom with natural elegance with Pressed Flower Botanical Nails!